Uncategorized
Logic Pro Tutorial: How to Use Logic Pro (Tips for All Levels)
Logic Pro is one of the most popular DAWs for beginners and pros alike.
If you use an Apple computer for music production you’ve probably considered Logic Pro for your main recording app.
Like most of the major DAW’s available today, Logic is a powerful piece of software. But it doesn’t have to be intimidating.
With a solid overview, you can easily understand everything that Logic Pro has to offer and decide if it’s the best choice for you.
In this article I’ll break down every important feature in Logic Pro and show it compares to other DAWs for new and emerging producers.
Let’s get started.
What is Logic Pro?
Logic is a digital audio workstation for Apple computers. Originally developed by Emagic in the 1990s, Logic has deep roots in the first era of DAW software.
It began as a MIDI-only sequencer called Notator Logic alongside other PC-based sequencers like the original Cubase.
In 2002 Apple purchased Emagic and integrated its software into its lineup of creative programs. In 2004, they used a stripped-down version of the tech to create the hit app Garageband that has come free with every edition of Mac OS since Panther.
Since then, Logic Pro has been one of Apple’s flagship creative pro apps and a major player in the DAW landscape.
The software came in numbered editions until Logic 9 when Apple updated the look and feel with Logic Pro X. It dropped the X to become just “Logic Pro” in the latest edition.
Hot tip: Want more DAW tips, deep dives and in-depth tutorials? Sign-up to the LANDR Newsletter to get the best production advice right in your inbox.
Never miss a post from the LANDR Blog.
Get the newsletter weekly.
Garageband to Logic—should you switch?
Speaking of Garageband, the free introductory DAW shares its basic DNA with Logic Pro.
The look and feel are similar and many of the workflow elements translate between apps.
It’s pretty common for new producers to start with Garageband since it’s designed for beginners and comes standard with every Mac.
However, Garageband is meant for first-time DAW users and lacks the deep features you’ll come to appreciate as you get more experience.
In fact, many Garageband users eventually graduate to Logic as they scale up their workflow. If you’re already comfortable in Garageband, you won’t have too much trouble getting started with Logic.
Many Garageband users eventually graduate to Logic as they scale up their workflow. If you’re already comfortable in Garageband, you won’t have too much trouble getting started with Logic.
It may feel intimidating to learn a new DAW if you’re learning the fundamentals of music at the same time, but there are significant benefits to making the switch.
Apple has produced a helpful guide to explain the process of graduating from Garageband to Logic.
What is the best way to get Logic Pro?
Logic Pro is inside Apple’s software ecosystem. That means the only way to get Logic Pro is to download it through the desktop version of the App Store.
The platform handles your payment as well so you’ll need to be set up with an account and payment method on the App Store.
Logic Pro’s price
Luckily, one of the best things about Logic Pro is its low price in comparison to other DAWs. At the time of this writing, a full, perpetual license costs only $199 USD.
In our Logic vs. Ableton comparison guide, Logic Pro’s price emerged as one of the most compelling reasons to choose one DAW over the other.
You’ll have to invest in Apple hardware products to take advantage of the deal, but it provides yet another reason to consider the platform for music production.
If you need an overview of the pros and cons of Apple devices over other music production computers, check out our in-depth guides.
How to get started with Logic Pro
Logic Pro is a classic DAW with all the features you need for a full music production workflow.
If you’re not familiar with those fundamentals yet, I’ll go through all the basics and explain how they work in Logic Pro.
Tracks
There are several track types in Logic Pro for adding different elements to your session. The most basic are audio tracks which contain sound files you record or download online.
You can also add Software Instrument tracks for VST synths, External MIDI tracks for hardware MIDI devices and a track type unique to Logic Pro called “Drummer”—more on that in a second.
You can create new tracks using the Tracks menu, the shortcut keys for each track type or the plus button at the top of the timeline window. After you create a track it appears in the Timeline view as well as the mixer view.
Hot tip: Pressing the X key will quickly toggle the bottom panel mixer window in the default window arrangement.
Mixer
Logic Pro is inside Apple’s software ecosystem. That means the only way to download it is through the desktop version of the App Store.
Logic’s mixer is a simple and powerful interface for balancing levels, selecting pan position, applying effects, and more.
Each channel comes equipped with Logic’s powerful channel EQ, as well as insert slots, group indicators, inserts, sends, I/O and solo/mute.
There’s a lot of information in this view, but it’s all laid out… logically. For example, assigning new send to a track automatically creates a new aux return channel that appears on the right side.
Region and track menu
Segments of audio on the Logic timeline are called regions. The top portion of the side panel includes a menu of handy options for selections of audio or MIDI regions.
These include fades, quantization, looping and more. It’s especially helpful for making changes to many regions at once. The track menu offers a similar set of options at a glance.
Audio editor
Double clicking an audio region on the timeline brings up Logic’s powerful audio editor in the bottom panel.
Segments of audio on the Logic timeline are called regions.
This view is helpful for making sample level adjustments that are too detailed to do on the timeline.
It’s also where you’ll edit your material using Flex Time and Flex Pitch. These are powerful Logic Pro features and I’ll cover them in more detail later in this article.
Piano roll
Logic includes a robust and full-featured piano roll editor for working with MIDI.
Simply double click any MIDI region on the timeline to bring up the note editor in the bottom panel.
Here you can adjust note pitch and length, quantize your performance and manipulate other MIDI information like velocity or channel.
The piano roll also features tabs for the Score Editor and Step Editor to give multiple views to see your musical information.
How to use Logic Pro features
With the basics out of the way are a few noteworthy features you should know about if you’re considering Logic Pro.
Flex Time and Flex Pitch
Flex Time and Flex Pitch are powerful audio editing tools built-in to Logic Pro.
If you’ve used vocal pitch correction software like AutoTune or Melodyne, Flex Pitch will feel familiar to you.
It works just as well as the brand name competitors for tightening up a pitchy vocal performance, but it’s great on other instruments as well.
Flex Time is a similar editor for rhythmic material. If you need to bring percussion or other elements onto the tempo grid, Flex Time can do it quickly and transparently.
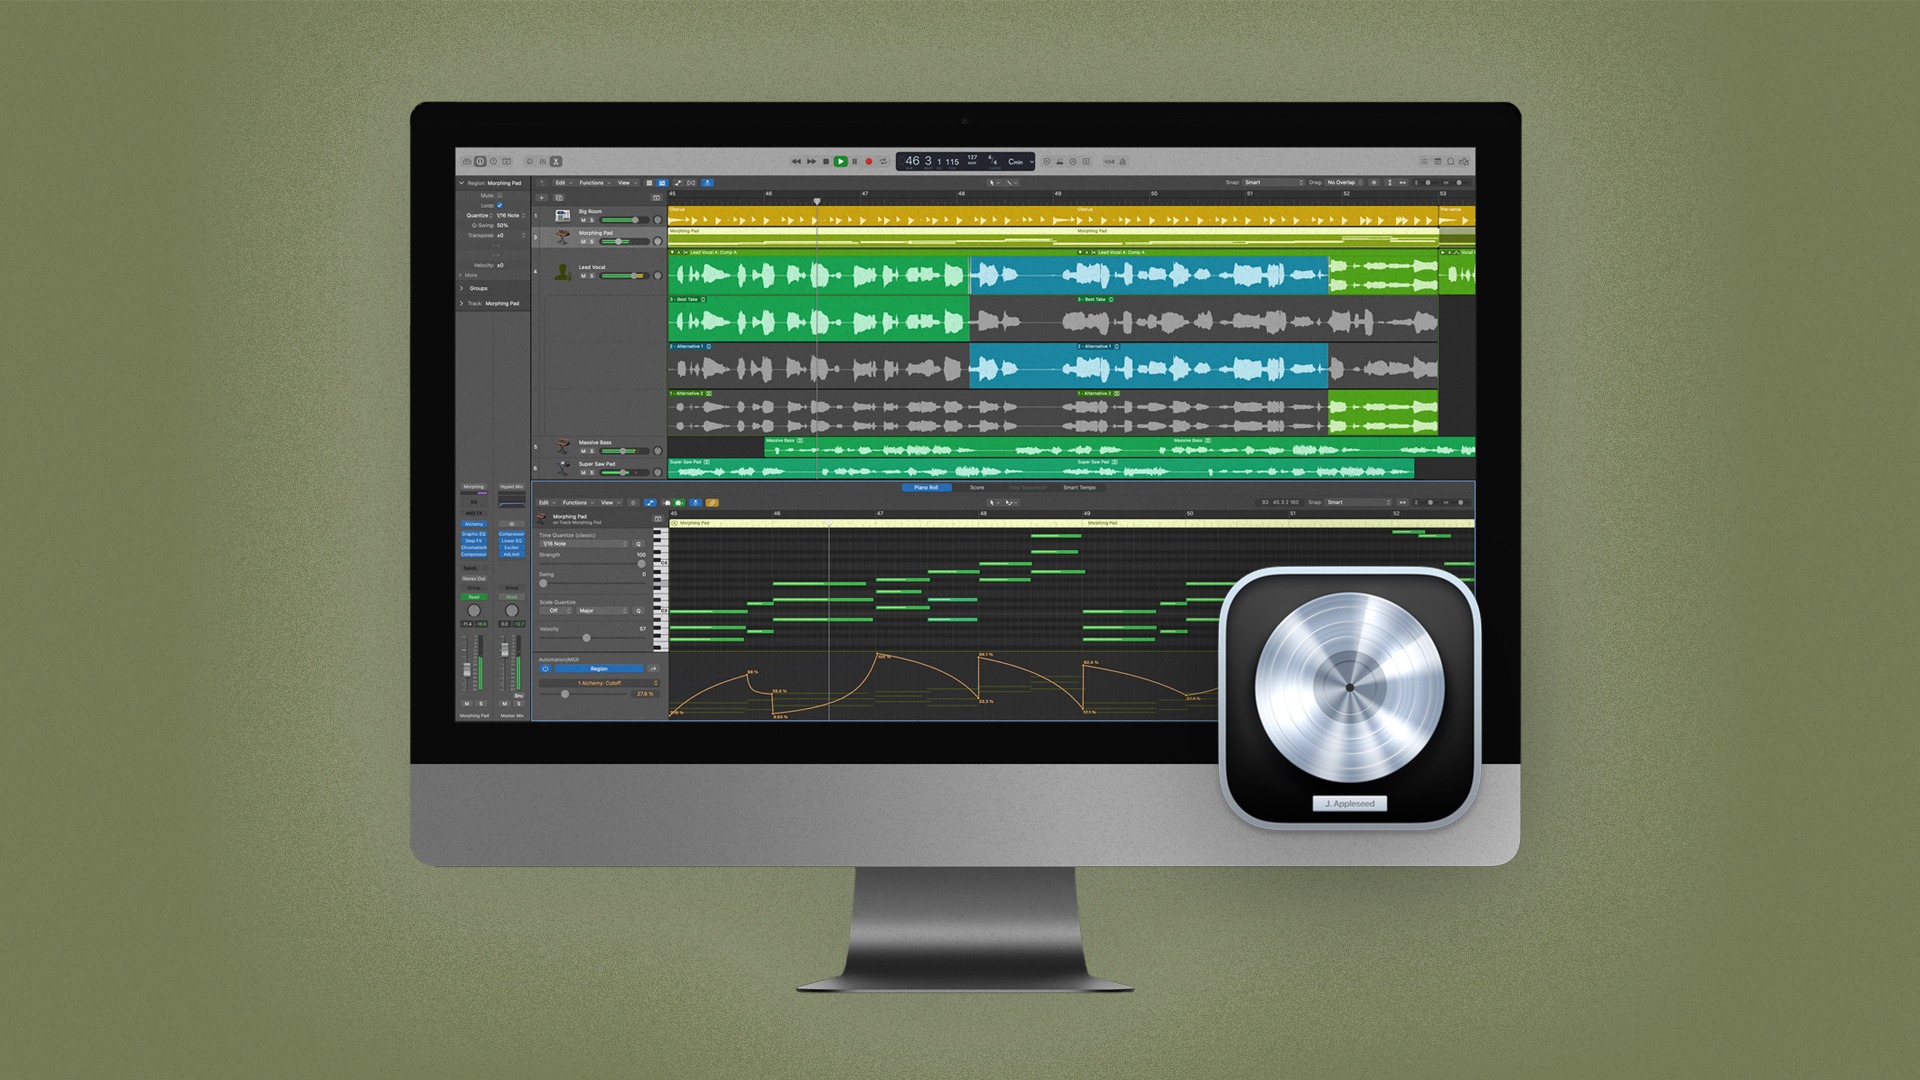
Comping, Alternatives, Track Stacks
Keeping track of your takes, edits previously used material is an important job in any audio project.
Logic Pro makes it easy with dedicated features for comping, grouping tracks and managing alternative files.
Comping is probably the most important because it’s an essential technique for polished studio vocals.
If you’re unfamiliar with the term, head over to our guide to vocal editing to catch up. But even if you’re just getting started with vocal production, Logic’s comping workflow is powerful and easy to understand.
You can also easily create folders of tracks called Track Stacks and store alternatives to make sure your sessions stay clean and organized.
You can also easily create folders of tracks called Track Stacks and store alternatives to make sure your sessions stay clean and organized.
Drummer
Drummer is Logic’s purpose built drum plugin with an innovative approach to programmed grooves.
Each kit and loop set is built around a unique player identity with names like “Kyle.”
While it may seem a bit abstract, it’s actually a handy way to get realistic rhythm parts into your songs fast.
Toggle between different players’ beats to get a feel for the genres and styles they do best and adjust their performance with the four way slider.
You may find it’s all you need to get inspired for a song!
Best Logic Pro instruments and effects
One of the biggest benefits of Logic Pro is its excellent suite of built-in plugins. While you’ll eventually want to curate your own collection of mixing plugins, Logic’s stock effects perfect for getting started.
I’ll go through a few of the best ones that set it apart from other DAWs.
Space Designer and Chromaverb
Reverb is one of the most important mixing tools for producers. There are many different styles out there and plenty of third party plugins to choose from.
But you might not even need to bother with these with the built-in Logic Reverbs. Space Designer and Chromaverb handle the two most important reverb types—convolution and algorithmic.
Space Designer comes with an excellent collection of impulse response files for modeling real acoustic spaces. Chromaverb can handle your dreamy algorithmic reverbs with a unique approach based on the absorption of sound in a circular structure.
Channel EQ and Vintage EQ Collection
The humble Channel EQ has always been a surprising benefit for Logic Pro users.
Every producer needs a flexible digital EQ for everyday tasks in the DAW. While there are well-respected options out there, it’s no fun to pay so much for a utilitarian plugin.
Channel EQ has a handy visual display on every channel strip and up to 8 filter bands if you include its LPF and HPF.
That’s enough power for any frequency sculpting job you might face in your workflow.
Complementing that is Logic’s suite of analog-style EQ plugins. These include the Neve-style Console EQ, the Pultec-style Tube EQ and the API-style Graphic EQ.
They’re all excellent takes on the most essential EQ tools of the analog era.
Alchemy and Retro Synth
Alchemy is Logic’s answer to high-powered modern synths like Serum. It’s a sound design powerhouse capable of producing many different textures with its unique engine.
Alchemy is Logic’s answer to high-powered modern synths like Serum.
Choose from additive, virtual analog, spectral or granular sampling oscillators for unlimited sonic possibilities.
But if you just need a simple, user-friendly synth with classic sounds ready to go, Retro Synth is perfect.
Its analog, sync, wavetable and FM synthesis modes give you access to the most common vintage synthesis tones in one package.
Drum Machine Designer and Amp Designer
Drum Machine Designer is a welcome update to Logic’s groovebox tools. Based on the extremely handy Quick Sampler plugin, Drum Machine Designer lets you build custom kits based on any sample with ease.
You can also plug in the awesome Drum Synth voice or any other plugin in any pad slot to create unique drum machines. Not only that, Drum Machine Designer’s component tracks are automatically bundled in a track stack for easy control of every single element.
Logic Pro takes the same approach to guitar plugins, with dozens of excellent amp models, virtual cabinets and stompboxes available in the Amp Designer plugin.
The sound quality rivals that of expensive third party guitar VSTs, so it’s handy to have built-in.
How to use Logic Pro for live performance
Most producers consider Logic a traditional recording DAW.
And although Logic is robust enough for most live situations, Apple offers a dedicated performance app called Mainstage.
Based on the essential features and workflow of Logic, Mainstage is VST host optimized for performing live.
It features all Logic’s native instruments and effects, making it an incredible platform for keyboardists or guitarists.
With helpful features like digital sheet music, lyrics and set lists, Mainstage is your software companion for live shows.
A logical decision
Logic has a huge amount of creative tools to offer for new producers.
In recent years Apple has focused on making it fun and accessible without sacrificing any of the professional quality it’s been known for since the start.
At a substantially lower price point than many other DAWs, Logic should be on your list to consider.

Michael Hahn is an engineer and producer at Autoland and member of the swirling indie rock trio Slight.
@Michael HahnGear guides, tips, tutorials, inspiration and more—delivered weekly.
Keep up with the LANDR Blog.