Uncategorized
How to Hear Compression in Mixing and Mastering

Compression is one of the most important tools in music production.
But it’s still sometimes misunderstood by beginner and intermediate producers.
Compressor plugins can be subtle and their effect on the sound isn’t always obvious—unless you know how it works.
The reason why? You’re not listening for the right thing.
In fact, you may need to learn how to hear compression before you understand what it really does, and how it makes your songs better.
In this article I’ll go over the basics of compression and how to hear it and apply it in your music.
What is compression?
Dynamic range compression in music is a process used in mixing to make the loudest parts of the signal quieter and the quietest parts louder.
It’s done so that loud peaks in a sound don’t sound distracting but the quieter passages can still be heard.
Compression used to require expensive analog hardware but it’s now easy to use in your DAW with compressor plugins.
How compression works
Compression works by turning the signal down whenever it passes a set level called the threshold.
How much the signal gets turned down after passing the threshold is called the ratio.

The higher the first number in the ratio, the more intense the compression. The amount of compression is measured in decibels of gain reduction.
The attack and release settings control the timing of the compressor’s effect. Here are the basics:
- A short attack time means the compressor kicks in dramatically as soon as the sound passes the threshold.
- A longer attack time lets the sound breathe more before the gain reduction occurs.
- A short release time means the sound snaps back to its uncompressed state faster
- A long release time means the sounds recovers smoothly and gradually from the gain reduction.
If you want a more detailed explanation of compression, head over to our in-depth guide.
Why you have to hear compression to use it
Unlike other mixing processes, compression doesn’t change the timbre of the sound dramatically.
Even with a highly colored character compressor, the basic tone won’t change much with properly applied compression.
Instead, you’ll have to listen to the sound’s dynamics.
You’ll have to start listening for which parts of the sound are the loudest, which are the quietest and how the sound breathes as the levels go up and down.
Compression is often easiest to hear on percussive material like a drum kit.
As the drum sound gets more compressed, the explosive attack of the kick and snare becomes less prominent and the body of the drums and the air of the room become stronger in the sound.
That’s one example, but you can use the same principles to hear compression if you break down a sound’s individual characteristics.
How to hear compression to set attack and release
Your goal with compression is to reduce the dynamic range enough to fit your sound nicely into the mix.
But great compression can make your tracks sound bolder, punchier and more intense.
To do so you’ll need to get the amount right using the threshold and ratio—and the timing right with the attack and release controls.
That means you’ll need to hear each quality clearly to know where you stand.
Here’s how to hear compression effectively in three steps:
1. Listen to the transient

The transient is the initial burst of energy at the very beginning of a sound.
The transient is the initial burst of energy at the very beginning of a sound.
I’m talking about the moment of impact when a drumstick hits the snare or the fraction of a second when a singer forms the syllable with their mouth.
The transient is almost always the loudest moment in any sound. When you decrease the compressor’s threshold, the transients are the first parts to cross the line.
If the compressor is working too hard, it will push the transients too far down into the body of the sound.
In the mix, that means that liveliness of the sound will be gone and it will start to feel flat.
That’s where attack and release controls come in. You need to decrease the threshold and choose a high enough ratio to control the sound’s dynamics in the mix.
But if the amount you need completely flattens the transients, you’ll need to adjust the attack as well.
Start with a fast attack and gradually slow down until the liveliness comes back. Stop as soon as the sound is controlled well by the compression.
2. Listen for a pumping sound

As you adjust the attack you’ll start to hear the effect of compression on the sound’s dynamics.
But you might encounter another issue with the compressor’s timing.
When the sound drops below the compressor’s threshold level, its gain reduction function will stop acting on the signal.
If the compression stops too fast or too slow, you’ll hear an unnatural pumping sound as it disengages.
A common result is that the intense transient of a bass drum sucks in the sustain of the cymbals and creates a whooshing sound as it releases.
Start with a medium-to-long release setting and decrease it until the compressor’s decay naturally emphasizes the body and sustain of the sound, without sounding unnatural.
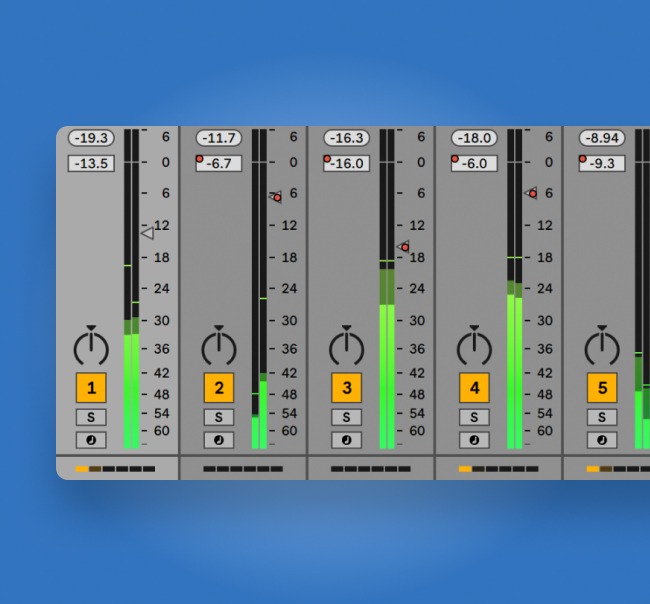
3. Learn your meters and watch them
These delicate settings can be difficult to hear as you first learn compression.
Luckily the meter on your compressor plugin is there to help. Watching it can give you crucial information about the effect your compression has on the signal.
A traditional compressor VU meter shows the amount of gain reduction applied to the signal in dB.
As you decrease the threshold, the amount of gain reduction will increase and you’ll see the meter trend in that direction.
But watching the meter’s action also gives you clues about attack and release. Does the meter bounce back and forth in time with the music? Does it snap back rapidly every time you hear a transient?
Try to coordinate the changes you make to the controls with the sound and the meters. Learning how they’re related will help you hear compression.
Compression in mastering
Compression in mastering is a different process that relies on the same fundamentals.
Instead of individual tracks, mastering compression is used on the whole mix during the final master.
Instead of individual tracks, mastering compression is used on the whole mix during the final master.
Dynamics control is still the goal, but it’s a much more subtle process designed to gently enhance the song without changing the feel of the mix.
It’s easy to do more harm than good with compression, especially when it comes to mastering.
That’s why mastering engineers are some of the most skilled pros in music.
It takes years of practice and skill to understand exactly how a compressor is effecting the final master.
Even so, you can still hear compression in mastering by listening for the same features I described above.
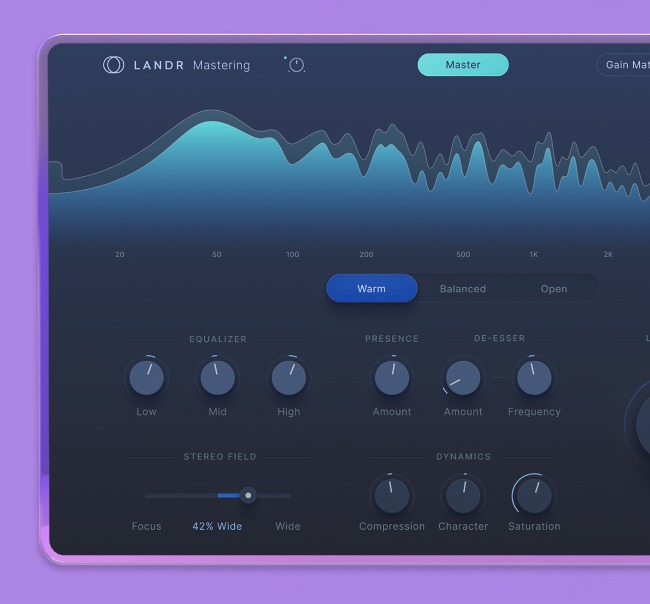
LANDR takes care of compression in mastering
Synapse is the brand new mastering engine from LANDR.
Our powerful, AI-driven mastering engine listens to your song and delivers pristine, studio-quality music that’s ready for release. Master a track.
With nearly a decade of AI research backing it up, it’s a vastly superior option for instant mastering compared to anything else out there–even so-called mastering plugins.
Today, Synapse is so smart it’s adept at putting the right amount of compression on any mastered track—we think it rivals even the best human mastering engineers.
Plus it comes at a fraction of the price of a pro engineer!
Here’s a simple example of how a LANDR master sounds when compared to an unmastered mix.
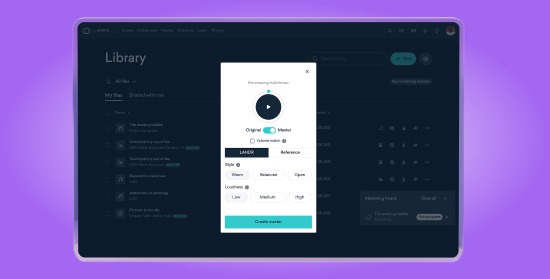
Try LANDR Mastering on Your Own Tracks
Anyone can master a track with LANDR’s new Synapse engine and select different intensities to vary compression levels.
On High intensity, you’ll hear the most aggressive compression. It sounds loud and punchy with a stylish squash from the heavy gain reduction.
Even so, Synapse preserves the musicality of the song’s dynamics. Kicks, snares and other important elements of the groove still breathe and punch through the texture on the beat.
Low intensity will give you the most natural dynamics. On this setting, you’ll barely hear the difference between your mix and the master—except for the change in loudness.
Medium intensity is a middle ground between the two with a healthy balance of dynamics and punch.
This is the kind of intelligent musical compression that makes Synapse’s dynamics engine so smart.
Compressor basics
Once you start to hear compression you’ll be addicted to the power it has in your mix.
Now that you have a great start for hearing how compression works and you’ll know how to hear it in your mix.

Michael Hahn is an engineer and producer at Autoland and member of the swirling indie rock trio Slight.
@Michael HahnGear guides, tips, tutorials, inspiration and more—delivered weekly.
Keep up with the LANDR Blog.